Monday, August 26, 2013

Smothered Burritos

This is a favorite of the hubby's and it's soooo incredibly easy, it's ridiculous. I like these because they are so easy to make, but my husband has a profound relationship with them. When he asks what's for dinner and I say Smothered Burritos his face lights up and says "Really? Good! Good!" I keep this recipe in a regular rotation to make my man happy. Isn't that the way to a man's heart? Through his stomach? Like I said before, he says he married me because of my chocolate chip cookies. So apparently, if you're lonely, just make a batch of those cookies and give them to every guy you know and you're bound to hook one. ;)
I found this recipe on Pinterest, and it led me to this blog Food Pusher and to the burrito recipe. She calls hers Chile Colorado Burritos and it's so easy, I just had to share with everyone. I call them Smothered Burritos because, well, that's exactly what they are. Lots of juice and cheese! You only need 3 ingredients in the crock pot and 2 more to assemble.

Ingredients:

2 lbs of stew beef (or as close to 2 lbs as you can find)
1 19 oz. can of mild enchilada sauce (I use Old El Paso because it's the best. Not too spicy)
2 beef bouillon cubes
Flour tortillas
Shredded cheddar cheese

Combine your beef cubes, red enchilada sauce, and 2 bouillon cubes (whole, just unwrap and throw those puppies in there) and stir together. Cook on low for 7-8 hours or on high for 3-4 (I always do the low setting). Sometimes the edges tend to burn, so be sure to look at it at around the 7 hour mark, if not, it's no big deal just discard the few pieces that got a little burned.
When the beef is done, lay out a tortilla and spoon in some of the beef (without the juice if you can) and I try to smash it down a little to spread it. If you're a fan of refried beans (which we're not) you can include some in the burrito. Fold the tortilla and spoon some juice on top of the burrito then cover it in cheddar cheese. I usually spoon more juice on top after the cheese to help the cheese melt some. You can also stick it under the broiler for a minute or so, but personally, I don't have time for that. The juice is so hot that it melts the cheese for me. Serve warm!

You can visit the original blog for other ways to cook the meat, like in your oven if for some reason you still do not have a crock pot. Best investment ever, by the way. Just sayin'. :)

Stew beef and bouillon cubes.
 
Add in the enchilada sauce.
 
Cook on low!

This is what I mean by smash it down.

\
Roll it up and smother it until it can't breath!

Tuesday, August 13, 2013

Pancakes

When I still lived at home and my older siblings visited I was always the one in charge of making the pancakes in the morning. These pancakes are oh so good. They are very satisfying where you could easily be full on 1 or 2 pancakes, depending on how big you make them. Now, don't get me wrong, I love the IHOP light and fluffy pancakes, but these... They just hold a special place in my heart, or stomach, or whatever. They are the true meaning of panCAKE. More cakey and dense than your typical pancake. Which is what makes them so awesome and filling.

If you keep powdered milk on hand, this is the perfect recipe to use it in. My mom always kept powdered milk on hand and that's what I usually used. They actually taste a little better with the powdered milk, believe it or not. I don't keep it on hand, so I just use regular milk. I also add a dash of vanilla extract to give it more flavor. If you wanted, I'm sure you could add any flavor extract, or just omit it all together. This was my addition to the recipe that I did years ago.

The original recipe calls for oatmeal, but you can easily skip it and just add more flour. That's what I've always done. I think I only made these with oatmeal once or twice. They are good with the oatmeal, but I like my pancakes with less lumps. It's a texture thing.

I actually halved the recipe for my little family because the full recipe makes too many for just the three [soon to be four :)] of us. But when my whole family gets together I have to double the recipe so that everyone can have some, and even then I might go back and make another batch just so I can have breakfast too when I'm done cooking. So here's what you're going to need.

2 Cups Flour
2 Cups Oatmeal (or 2 more of flour)
1/2 Cup Sugar
2 Tbsp. Baking Powder
1 Tsp. Salt
3 Cups Milk (or 1 cup of powdered milk and 3 cups of water)
2 Eggs
1/3 Cup Oil (vegetable or canola)
Dash of vanilla extract (optional)

Mix your dry ingredients, add milk and eggs, then add the oil and add the dash of vanilla if desired. It's as easy as that! The batter will be thicker than your average pancake batter. But if you feel like the batter is too thick, you can always add a little more milk or water. A little at a time though, you don't want the batter to be runny.
Heat a skillet (or 2 if you want to double task) over medium heat. You don't want it too hot or the pancakes will burn and be raw on the inside. I sprinkle a little water on my skillets to test them and if they don't sizzle and evaporate right away, they are not hot enough. Once you get that quick sizzle and gone effect, ladle some batter on your skillet and since the batter is thick, I dip my pan around in every direction slowly to spread it around. Non-stick skillets would be best, if you don't have those, make sure you put some oil at the bottom while heating so they don't burn and stick.
Wait for your pancake to have lots of bubbles and craters, like your very worse acne you had as a teenager. Now unless you were one of the lucky ones and only had 3 zits at the same time, don't use the reference. It needs to be very bubbly. Flip and cook on the other side.
Top with anything you like on pancakes, fruits and whipped cream, peanut butter, nutella, butter and syrup, jelly or jam... Whatever! It's delicious with whatever you choose.

Mix the dry ingredients

Add the wet

Mix well until there are no more lumps. You can always use an electric mixer.

My batter was a little thicker than I liked so I added just a little bit more milk. This is what a round about look at what it should look like. Runny, but thicker too... makes no sense, I know.

Ladle and spread batter. Not a perfect circle, but it doesn't really matter.

Bubbles and craters.

Flip! OOOOO, AAAAAH! Golden brown

The other side doesn't cook as pretty, but that's ok, just keep it on the golden side and no one will ever know.

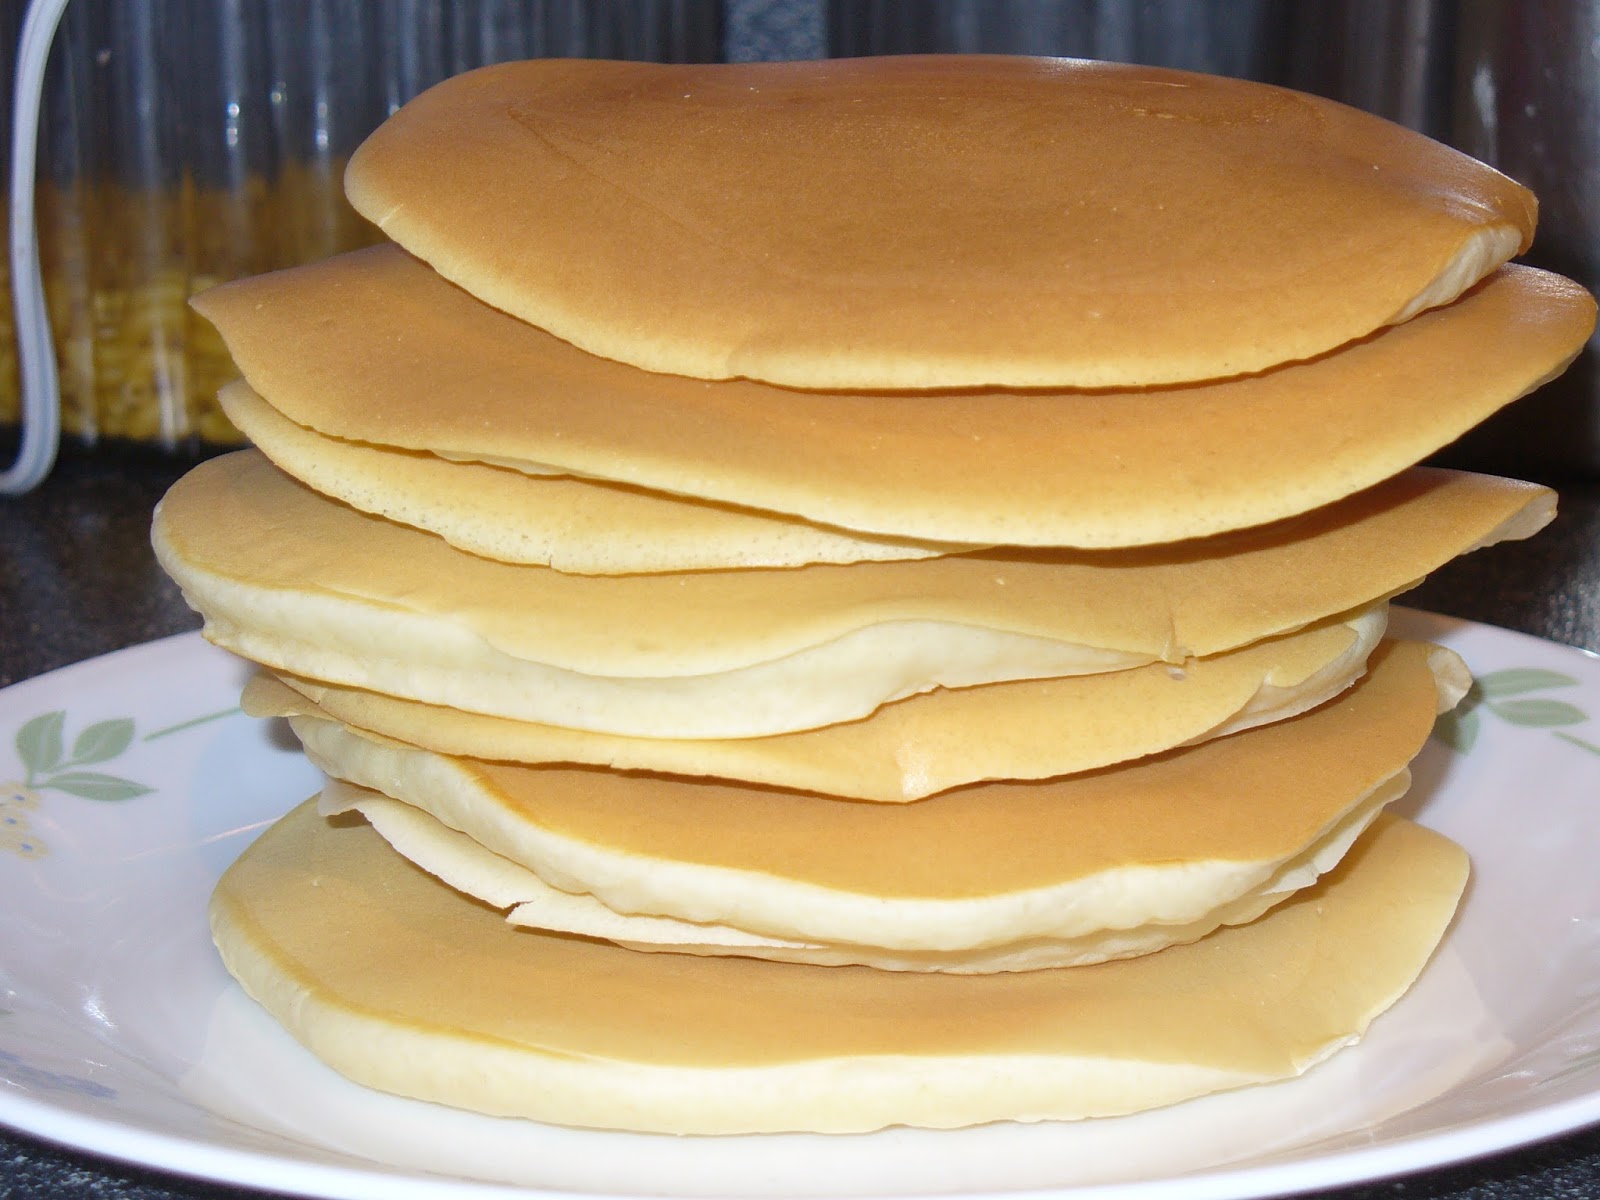
The perfect stack of pancakes!

Saturday, July 27, 2013

Easy Stroganoff

I have always loved a good stroganoff. I remember it being my meal of choice for my birthday dinner, as a child. Like I've mentioned before, I'm somewhat of a master of changing a recipe and making it my own. I found this good recipe in one of my cookbooks and after making it a couple times, I saw this commercial on TV for Hamburger Helper Stroganoff. Just like that, it hit me. Why not make my own hamburger helper with a recipe I already have? It was the perfect candidate recipe to try it on. After a few adjustments on quantities I got a super easy, super tasty homemade hamburger helper stroganoff.

Ingredients:

2 lbs. ground beef
1/2 cup onion, chopped (approx. 1/2 onion)
2 garlic cloves, minced
16 oz. sour cream
4 tbsp. flour
4 tsp. beef bouillon granules
1/2 tsp. black pepper
1 cup water
1 box cork screw noodles

In a bowl, combine the sour cream, flour and bouillon granules. Add the black pepper and water and whisk until smooth, set aside. In a large skillet brown the ground beef with the onions and garlic. Drain off fat and return to the skillet. Add the sour cream mixture and continue to cook over medium low heat until the sauce has become thick and bubbly, about 15-20 minutes. In the meantime, cook your noodles according to the instructions on the box. Place noodles on a plate and the stroganoff on top and it is DELICIOUS! You can always add some salt if you think it needs it.

That's it! How easy is that? I'm all about easy tastiness. A heads up, I tend to always end up with more meat than noodles. So you may have to cook more noodles than just that one box. I wanted to be sure to include this disclaimer in there.

Sour cream, flour, and bouillon granules. Mix well!
 
Whisk in the water and black pepper.

Ground beef, onions, and garlic.

Add sour cream mixture.

Cook it down

My mom always said don't judge by the way it looks. You have to taste it first, then you'll see how good this really is.

Wednesday, July 10, 2013

BBQ Taquitos

I got the base for this recipe from another blog called Chef in Training. There's a really good recipe for Baked BBQ Beef Taquitos I found on Pinterest. When I first made them, my husband fell in love with them. But I just couldn't help myself from experimenting with the recipe a little and try to change it some. When I first mentioned this to my husband he did not like the idea. He knows how I like to substitute ingredients and change things around and make them "a la My" and this one was just fine the way it was...or so he thought. :)

I had this urge to add white rice to the recipe and make the taquitos out of corn tortillas instead of flour. Then I realized that these tended to suck the moisture more so I upped my BBQ sauce amount and it was perfection. My husband said he liked the flour tortillas better, so that's what I went back to, but I thought it was delicious with the corn tortillas as well. I can honestly say that I have perfected the recipe to our taste and I make them a lot! It's a constant visitor in our meal rotation.

Ingredients:

1/2 Cup Uncooked White Rice
1 lb. Ground Beef
3 Tbsp. Cream Cheese (I've also used sour cream when I was out of cream cheese and it was ok)
1 tsp. Ranch Dressing Mix (those that come in the packets)
1/2 tsp. Onion Powder
1/2 tsp. Garlic Salt
Scant tsp. Salt (optional) *scant- slightly less
1 1/4 Cup BBQ sauce (Sweet Baby Ray's is the best!)
1 Cup Shredded Colby-Monterey Jack Cheese Note: I've also used cheddar because it's all I had and it was good too.
15 Small Tortillas (Flour or corn, if using corn I recommend adding another 1/4 cup BBQ sauce)

Preheat oven to 400 degrees.

Cook the rice in 1 Cup of water. Bring to a boil, then lower heat and simmer until the water is gone. Stir occasionally. While that is cooking, brown the ground beef in a medium skillet until completely done. Drain extra fat and place the beef in a medium bowl. Mix in cream cheese right away, it helps when the beef is hot to melt it together. Add the rice, ranch dressing mix, onion powder, garlic salt, and salt (if desired), BBQ sauce and cheese. Mix well together until it is thoroughly blended. Take a tortilla and fill it with a spoon full of meat mixture. Do not over fill or you will have a hard time rolling it together. Place on a baking sheet and repeat until you are out of meat. Sometimes you will need more or less tortillas, depending on how much you filled each one. Once all the taquitos are lined up, spray them with cooking spray. Bake for 15 minutes or until they are golden brown on the edges.
They will be piping hot, so be careful when you take a bite. Store any extras in an air tight container and refrigerate. I have been meaning to make a huge batch of these and freeze them, but I haven't gotten around to it yet. I will let you know if they turn out ok after freezing.

Note: If you have any left overs, the best way to warm them up is in a George Forman Grill. It makes them crispy and super delicious. Plus it only takes about 1 minute to warm up all the way through.


Looks a little weird, but it's delicious. Trust me!

Just a spoon full or slightly more, not too much though.

Line em' up, and spray em' down.

Mmm mmm good!

Friday, July 5, 2013

Core an Apple

This week's post is actually not a recipe, but still has to do with food. I came up with this nifty trick when K was younger and started to really enjoy eating apples. I don't know about you but I absolutely hated to core an apple. And sure, you can use those tools that are supposed to core and slice the apple at the same time, but each apple is made slightly different and you never get a straight cut. There's nothing I hate more than eating an apple slice and biting right into some of the left over core that didn't get cut. It might be just me though, I'm kind of funny about texture sometimes and if I know it's not supposed to be there, it ruins whatever I'm eating.

I remember as a child watching my mom core an apple with nothing but a knife. I thought she was so talented. I could never cut out the center as well and as pretty as she could with my knife. Then I would end up with a hacked up center on my apple and it just wasn't the same. So, one day it just occurred to me. Kind of like those V8 commercials where they get hit on the forehead. How did I not think of this before!! All I needed all those years was a melon baller. Now, follow me on this... you still need the knife to get the upper and lower part out, but for the center you just line up the melon baller and scoop it out! It was one of those rare genius moments I had and I've been sharing with everyone. When I showed my mom and sister they were both so impressed and their immediate comment was "Did you find this on Pinterest?!" NO! That was all me, baby! So here's what you do:

Get your apple, knife, and melon baller.

Slice your apple in half, then scoop out the middle!

Then with your knife cut in a triangle the upper and lower part of the core.

And voila! A perfectly cored apple. K likes to eat them whole like this so this is where I end my cutting, but they slice up very nice too with this coring technique.

Friday, June 28, 2013

Nestle's Chocolate Chip Cookies

So you might be thinking why am I posting about a recipe that is so wildly known. Well, my husband LOVES these cookies more than life itself. He said he married me partly because I make such awesome chocolate chip cookies. How romantic, right? Anytime I bring these along anywhere people rave on how good they are and want the recipe. I always tell them it's just the Nestle recipe that's found on the back of their chocolate chip bags and they never believe me. Yes, it's true! They ARE that good and the people at Nestle have some culinary geniuses.

This batch that I made tonight is for my husband's work since he bragged about them to his co-workers and they are wondering why they haven't gotten any yet. So here you go nurses! Hope you enjoy them. And of course I'm keeping some at home because you just can't make these and not keep just a few for yourself. Especially when you're 5 months pregnant. :)

Ingredients:

2 1/4 Cups all-purpose flour
1 tsp. baking soda
1tsp. salt
1 Cup (2 sticks) butter or margarine, softened (I don't always have mine softened and it works just fine cold. Maybe just a little hard to work with at first.)
3/4 Cup granulated sugar
3/4 Cup packed brown sugar
1 tsp. vanilla extract
2 large eggs
2 Cups (12-oz pack) Semi-sweet chocolate chips
1 Cup chopped nuts (I never put nuts in mine, but I wanted to give you the option if you wanted it.)

Preheat oven to 375.

In a small bowl, combine the flour, baking soda, and salt. Then in a larger bowl, cream together the butter, granulated sugar, brown sugar, and vanilla. Add your eggs (it says one at a time, but I always put both in and stir it really well). Gradually mix in your flour mixture, stirring well after each addition. I usually break it up in 3 portions. Stir in your chocolate chips.

This is THE most important part; how your bake them. Cover your baking sheets with parchment paper. They turn out soooo much nicer with parchment paper. Then drop about a rounded tablespoon spaced 1 1/2 inches to 2 inches apart. It says to bake for 9-11 minutes, but I have found that if you have parchment paper on your sheets the perfect baking time for me is 10 minutes. If you don't have any parchment paper only bake them 8-9 minutes. If they turned brown on the sides, they are over baked and won't be as delicious. They have to be undercooked just a tad to make them moist and super gooey delicious. After baking, I leave them on the baking sheet for a few minutes, then remove them to a spread of paper towels (you could also use some paper grocery bags. That's what my mom used to do) and cool them completely. Or go ahead and stuff one in your mouth. :)

When you store them, I find it best to place some wax paper in between each row of cookie or they will stick to each other and you'll end up with crumbs everywhere when you try to pry them apart.

Creamed butter and sugars

Flour mixture

So, I've got pregnancy brain like never before and I forgot the eggs before my 1st addition of flour. Oops! This is completely new to me, I was not this forgetful with my 1st child. This one is sucking every ounce of common sense I have.

But no big deal, I went ahead and stirred the flour in, then added my eggs. I had just put K to bed for the night so I didn't want to use my electric mixer. Good ol' fashion spoon does the trick too.

After, I added my 2 other portions of flour in, then my chocolate chips.

Try not to get too excited about your cookie size. If you make them too big they will run into one another as they bake and you'll have to cut them apart some. It happens to me every time. I just can't help myself.

That is the perfect cookie! Super chewy and super chocolaty. You can't just eat one. And even two is hard to stop. I made myself stop at two only because when I'm pregnant I tend to gain beaucoups of weight.

Tuesday, June 18, 2013

Mama's Meatloaf

I call this one Mama's Meatloaf because this is what we always referred to it as. This is my mother-in-law's recipe, but as my strong genetics shine through, I modified it a little bit. Nothing extreme but when I don't have a certain ingredient, I tend to replace it with whatever I have on hand. And I say my strong genetics shine through because my mother is notorious for doing this exact same thing. I remember as a child we would ask what was for dinner and she would reply "(insert dinner meal) a la Di". Which meant she had put her own twist on it. Her name is Diane, hence "a la Di". Sometimes it worked, sometimes...not so much. Hey, you live and learn.

So, I did the same thing with this recipe. I made some substitutions and some conversions for measuring and voila it became my husband's favorite dinner. Pair it with my southern mac and cheese and it's a definite winner. See here for that awesome recipe. So I will post the original recipe, and in parenthesis I will insert my substitutions. That way, if the meatloaf God moves you, you can try both and please feel free and let me know which one turned out best for you.

Ingredients:
2 lbs. Ground beef (or the 2.25 lbs. pre packaged ground beef)
1 5 oz. can of evaporated milk (2/3 C. of milk)
2 eggs, beaten
3 Tbsp. Worcestershire Sauce
1 C. Onions- or less (I just chop up half an onion)
5 Slices of bread, crumbled (1 heaping Cup of Italian bread crumbs)
1 C. Ketchup
Salt & pepper to taste

Preheat oven to 350.

You might notice that instead of a white or yellow onion I have green onions. This is an example of "a la Di" that shined through. I had forgotten to get an onion and this is all I had, so I went with it. You could also omit the onions, but please, onions just add that "je ne sais quoi" and I had these on hand.

Here's my milk in the measuring cup, and I'm adding the Worcestershire Sauce.

I'm a big fan of combining, so in goes the eggs as well. Beat it all together.

Got my meat in the bowl and I'm adding the onions. I felt like 1 green onion wasn't enough and 2 might be too much. So I had some cut up green onions in my freezer and added some to it.

Next comes the bread crumbs...

And the ketchup...

Pour that nasty looking milk, sauce, egg mixture in, add salt and pepper if your heart desires, and go to town with your hands. It might be a good idea to remove any rings before digging in. Put them somewhere safe now. I don't want to be held responsible for any lost jewelry. Especially wedding rings.

I like to separate mine in 2 loaf pans. There's too much meat to put in just 1 but you could also use a square 8 X 8 pyrex. It might just take a little longer to cook all the way through. Cook on 350 for an hour.

These have a lot of grease in them so what I do is pour out as much grease as I can without dumping the loaves in the sink.

I always like to return them to the oven for 10-15 minutes more. I feel like the grease that accumulated keeps it from cooking all the way through. And there you have it, delicious meatloaf...a la My.